How I Set Up Google Analytics 4 (GA4) and Google Tag Manager (GTM) on My Blog: A Step-by-Step Guide
Why should you set up GA4 and GTM on your website?
If you are here, you probably do not need me to tell you why you might be interested in setting up GA4 and GTM on your site.
However, if by some random chance you managed to stumble onto this blog post and need some convincing, here are some reasons:
Why Set Up GA4 Tracking?
- Easy Set-Up: GA4 is an easy-to-use digital analytics tool that is designed to be straightforward and easy for beginners.
- Integrate with Googles Marketing Stack: GA4 works effortlessly with other Google platforms like Google Ads for paid search campaigns, Search Console for SEO insights, and BigQuery for advanced data analysis. This makes it a powerful part of Google’s marketing ecosystem.
- Highly Customizable: With GA4, you can create custom events to track actions that matter to you—whether it’s user engagement, conversions, or other KPIs. It offers flexibility to dive deep into data based on your specific needs.
Why set up GTM?
-
Simplified Tag Management: GTM allows you to manage all your tracking codes (tags) from one central place, without needing to edit your website’s code directly. This makes adding and updating tags faster and less prone to errors.
-
Easier Collaboration: Whether you’re working with a developer or on your own, GTM makes it simple to organize, modify, and control the flow of data across various marketing and analytics platforms, all within an intuitive interface.
If terms such as tracking codes and KPIs scare you, don't worry I might write a post about these in the future!
Getting V1 tracking up and running
Now that we've laid down the why lets talk about the how. Here are the steps we want to achieve in this guide:
- Create a GTM Container and Install It on Your Site
- Create a GA4 Property
- Setting up cookie-cutter GA4 tracking with GTM
Create a GTM Container and Install It on Your Site
A Google Tag Manager (GTM) container is where you’ll manage all of your tags. Think of it as a bucket that holds all the scripts you need to track user interactions. The first step is to create your container and install it on your website.
Step 1: Sign in to Google Tag Manager and create a new account for your website.
Step 2: Name your container and select the target platform, in this case "Web".
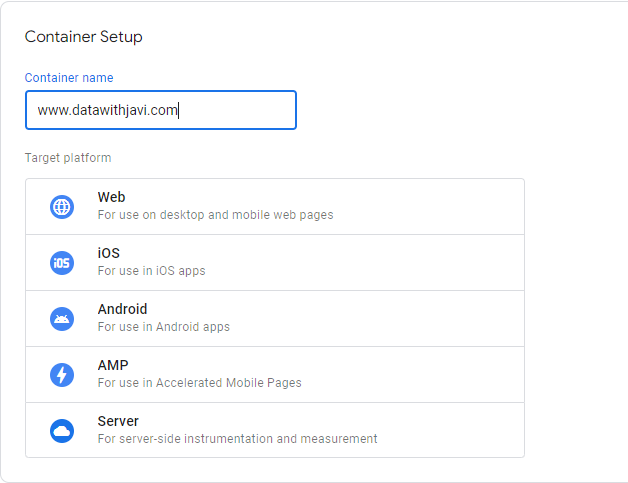
We will get into some of the other options on future posts, for now just know that server side tagging is very cool
Step 3: GTM will give you a small code snippet to add to your website's <head> and <body> sections. This step ensures that GTM is installed properly and ready to start managing tags.
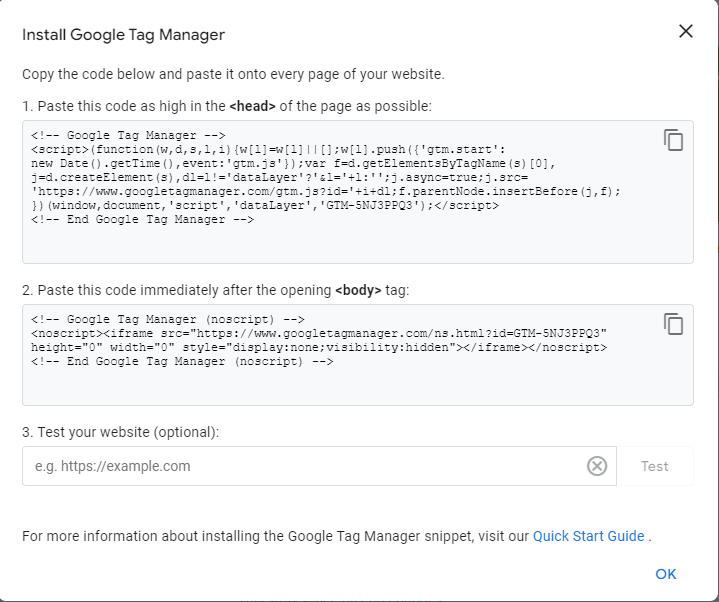
Once installed, GTM will be your control center for tracking tags and scripts, without the need to edit your site’s code again.
Create a GA4 Property
Now, it’s time to create your Google Analytics 4 (GA4) property.
Step 1: Log in to Google Analytics and select the option to create a new account and fill out the details.
Step 2: Select create a property and fill out the prompts to enter basic information like your website name, URL, and industry.
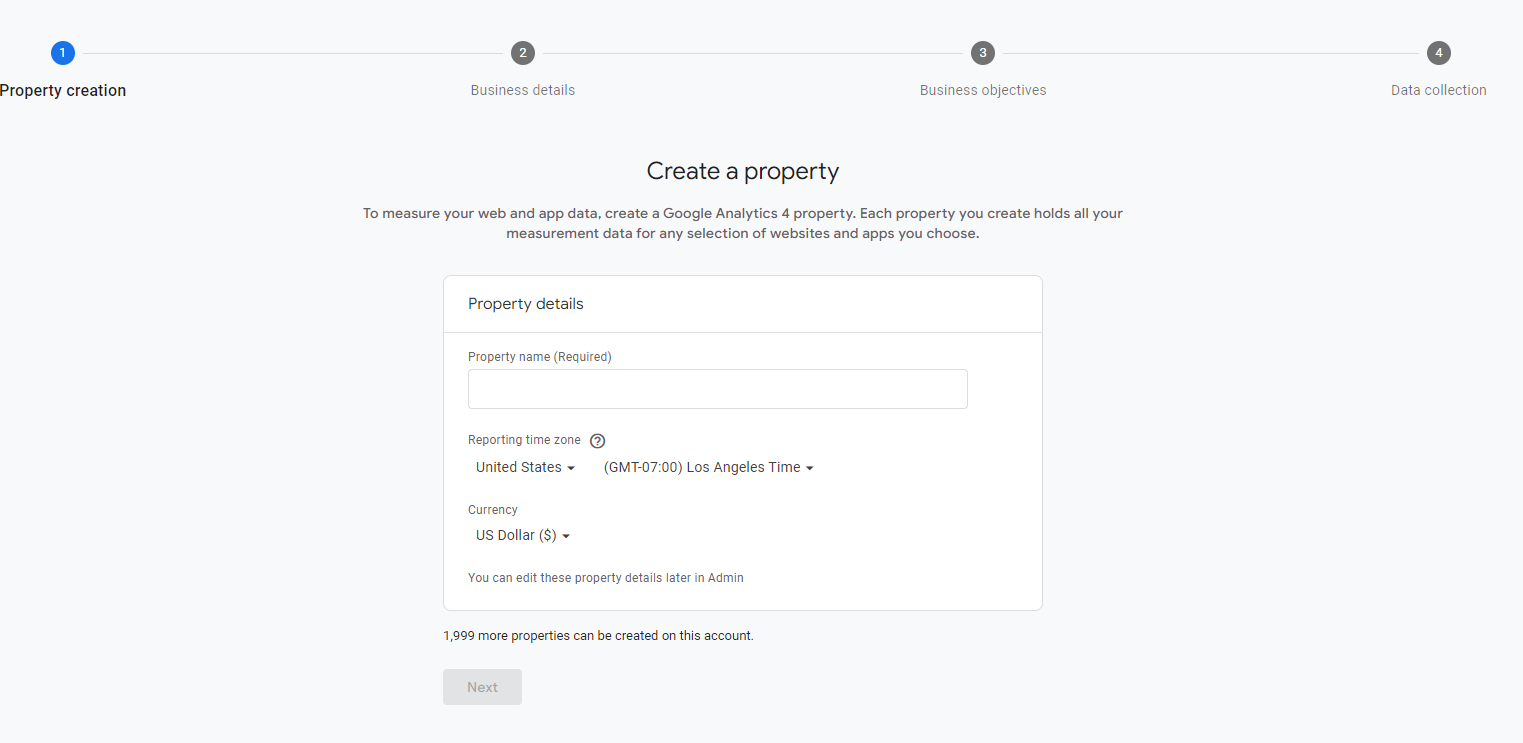
Step 3: Once you get to step 4 "data collection" of the property set-up process you will be asked to set up a data stream. Select web and fill out details such as site url and stream name. Don't worry about what you name these, don't really have any impact on your measurement.
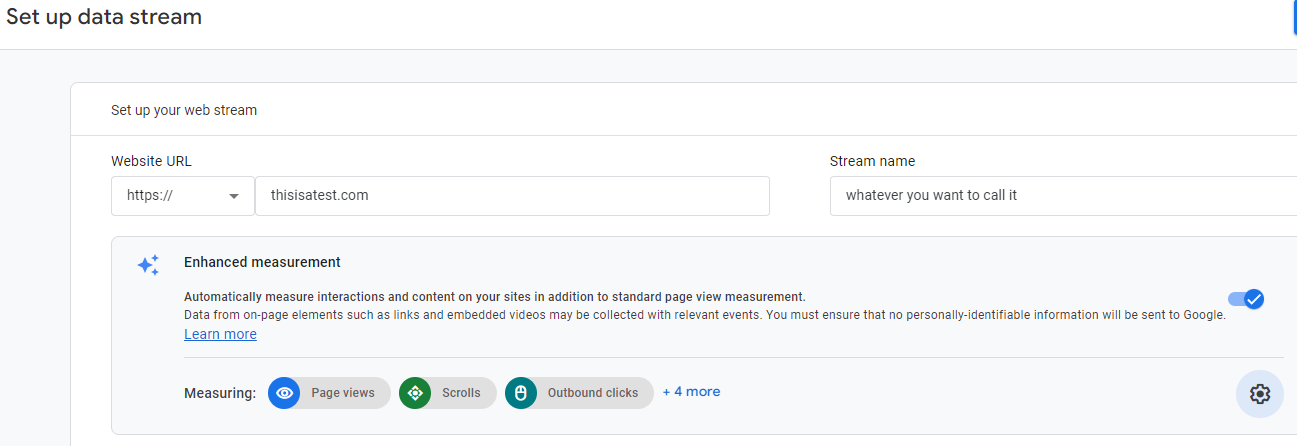
You can also select what automated events you allow your data-stream to track.
My recomendation is to leave all of them enabled for the most-basic tracking. However, if you decided to customize your tracking a bit more in the future, I usually suggest that you disable these and create your tracking for these events from scratch.
Here is some documentation in case you are interested to know more about GA4's automated event collection.
Step 4: Copy the generated stream-id, you will need this for the next step:

A stream id is usually a string that in a format like "G-XXXXX" you can find it by clicking your data stream or going to admin > data streams > selecting your stream
Set Up Basic GA4 Tracking in GTM
Now that both GTM and GA4 are set up, we’ll link them together to start tracking user interactions on your site. We won't deep dive into the theory of it all, but worry not, I have you covered on a future post.
Step 1: In GTM, click on Tags and select New to create a new tag.
Step 2: Select GA4 Configuration as the tag type and paste the measurement ID from your GA4 property into the corresponding field. I like to create a variable with a "constant" type equal to my measurement ID first and add the variable instead.
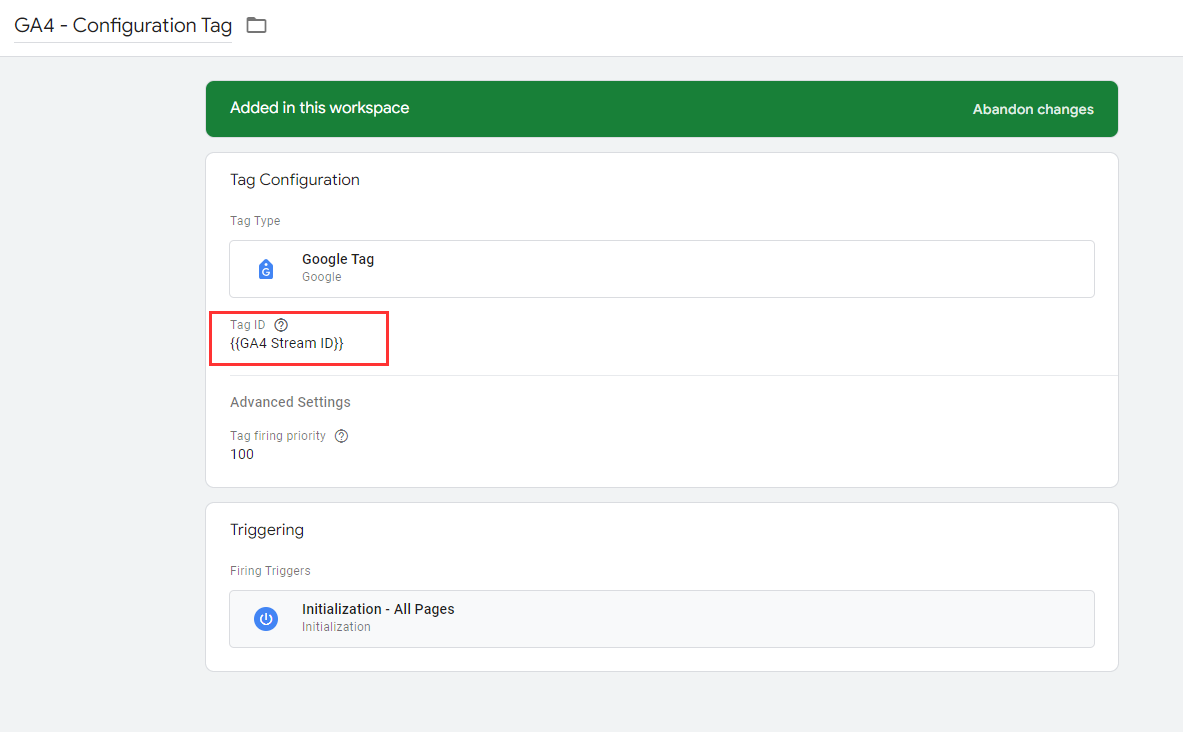
Step 3: Set the trigger to initialization trigger so that it fires as early as possible on every page of your site. If your site is a SPA, implementation will be different.
Step 4: Save the tag, then click Submit to publish your changes in GTM.
This basic setup will start tracking user activity such as page views on your site, which will feed directly into GA4.
If your site is a Single Page Application, things might be a tad more complex. I like the following article as a reference of what to do in those cases
Test Your Setup
Before calling it a day, it’s important to test that everything is working correctly.
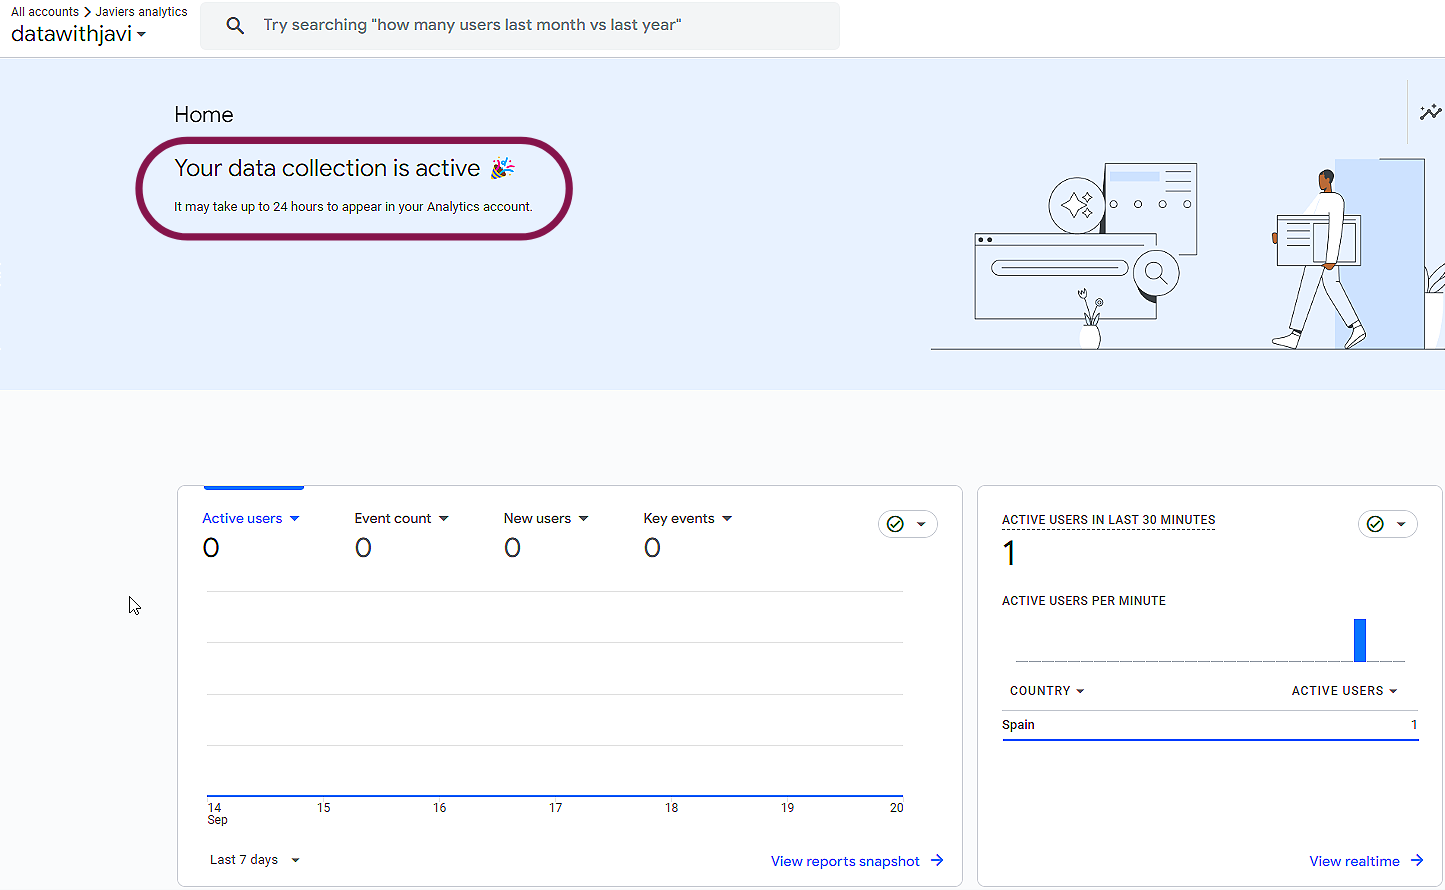
You can do this by visiting your site and navigating a bit. Subsequently, go GA4's real time reports. You should see some live data populating, such as users and events being fired.
Conclusion
By following these steps, you’ll have your GA4 and GTM basic tracking up and running in no time. From here, you can start exploring more advanced tracking and customization based on your goals.
Stay tuned for future posts where I’ll dive into more advanced configurations, some theory behind both platforms and other data and digital analytics topics.
FAQ
Hey Javi, I'm not sure how to add Google Tag Manager to X CMS?
Hello dear reader, I get your pain. Sometimes, depending on the platform you are using, it might not be as straightforward of a process. What should you do?
- Read your CMS or site providers documentation.
Usually, there will be multiple ways of getting GTM set up onyour site, and the key to unlocking these is to read-up on your platform of choice. Some common methods I've seen through my carrer as a digital analytics consultant:
- Adding it to your theme: Usually CMS will allow you to install a theme. They often come with the option of editing such theme. Make sure you are careful and do not break your site doing this.
- Plug-ins: CMS such as wordpress might have plug-ins you can install that allow you to easily add GTM to your site, by providing your containers ID
- Code-injection: This blog runs on Ghost CMS. By reading the documentation, I found this handy feature called code-injections. It allows you to add scripts to your sites header or body, so I leveraged it to install GTM.
A lot of providers will have similar functionalities.
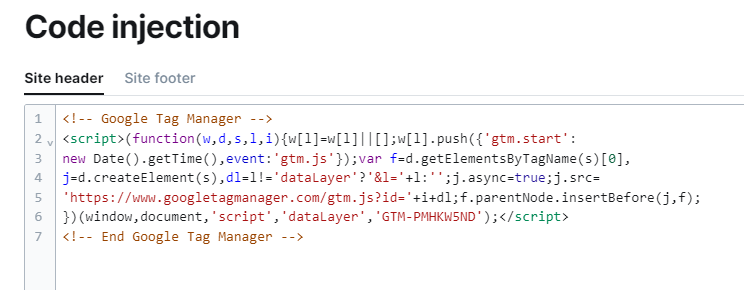
Code-injection feature in Ghost CMS used to inject GTM on this site