Unlocking The Power of Content Categorization in GA4 with Ghost CMS
Without proper organization, you can’t analyze user behavior effectively

Imagine you own a bookstore. Every day, hundreds of customers walk through your doors, eager to find their next favorite book. However, you notice that recently your sales have been low.
To fix this, you want to analyze how customers are moving through your store. But instead of neatly organized sections, your books are scattered randomly across your store.
Without structure, it's impossible to see which sections are attracting customers, which areas are underperforming, or where improvements are needed to boost sales.
This is exactly what happens when you don’t categorize pages on your website. Without proper organization, you can’t analyze user behavior effectively, making it difficult to understand which pages drive conversions and which ones need attention. Page categorization helps make sense of your data, allowing you to pinpoint problems and optimize for better results.
This is where content categorization comes in.

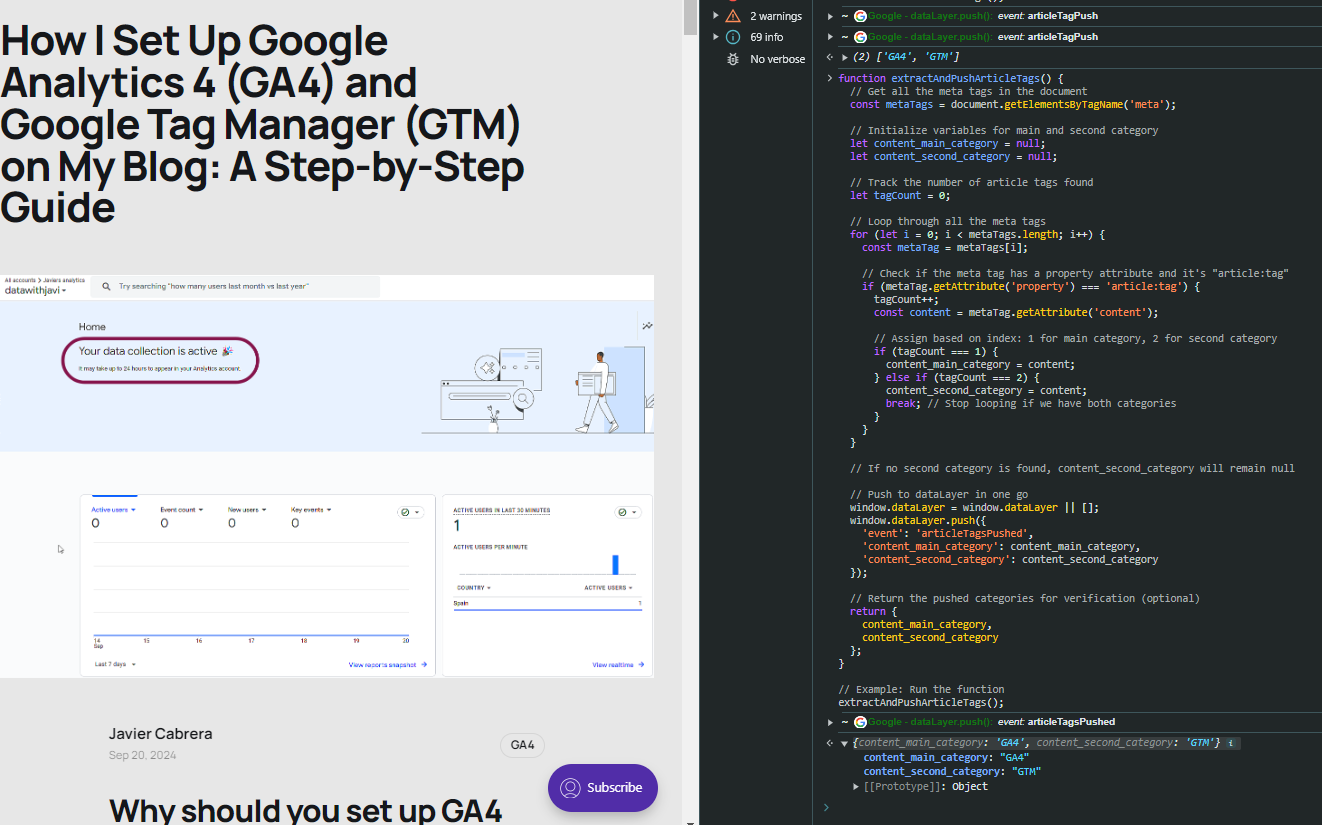
If you are a Ghost CMS user and haven't set up GA4 and GTM already, check out this article with a step by step guide.
Just like many problems in life, there are several ways to tackle this one. For our solution, we chose to use Ghost CMS’s built-in tagging system along with some simple JavaScript to send content categorization data to our site’s dataLayer.
If that sounds a bit overwhelming, don’t worry—we’ll break it down step by step!
Defining our content categorization
Before jumping into implementation, its important to take a step back and define how you might want to analyze your content. For this blogs V1 measurement, we have thought of 4 distinct categorizations:

Categories for Blog Post Categorization:
-
post_main_topic: This defines the primary topic of a blog post. For example, this blog post will be categorized under "GA4" since it’s primarily focused on Google Analytics 4.
-
post_second_topic: A secondary topic that provides an additional layer of categorization. This helps when a post covers multiple topics. For example, this post could have a secondary topic of "Ghost CMS" or "JavaScript," as we are touching on how to push data to the dataLayer using Ghost CMS and JavaScript.
-
blog_post_content_type: This describes the intent or format of the blog post. Possible values include "Guide," "Thought Piece," "Tips & Tricks," or "Case Study." For instance, this post can be categorized as a "Guide."
-
is_blog_post: A simple binary classification to distinguish whether the page is a blog post or non-blog content (like a product page or landing page). It helps in separating blog content from other types of pages for analysis.
Leveraging Ghost CMS Internal and External Tagging
Ghost CMS offers a flexible tagging system that we can harness to implement these advanced categorizations. Here’s how we’ll use Ghost’s tagging system to manage our content categorization:
Internal vs External Tags
-
Internal Tags: These tags are used for organizational purposes within Ghost but are not publicly visible. They can be useful for structuring content for backend systems, like categorizing pages for analytics without affecting the front-end user experience.
-
External Tags: These are publicly visible tags that can be displayed on your site, helping users and search engines understand the content’s topics. They can also be used for GA4 to track high-level content categories.
Tag Order
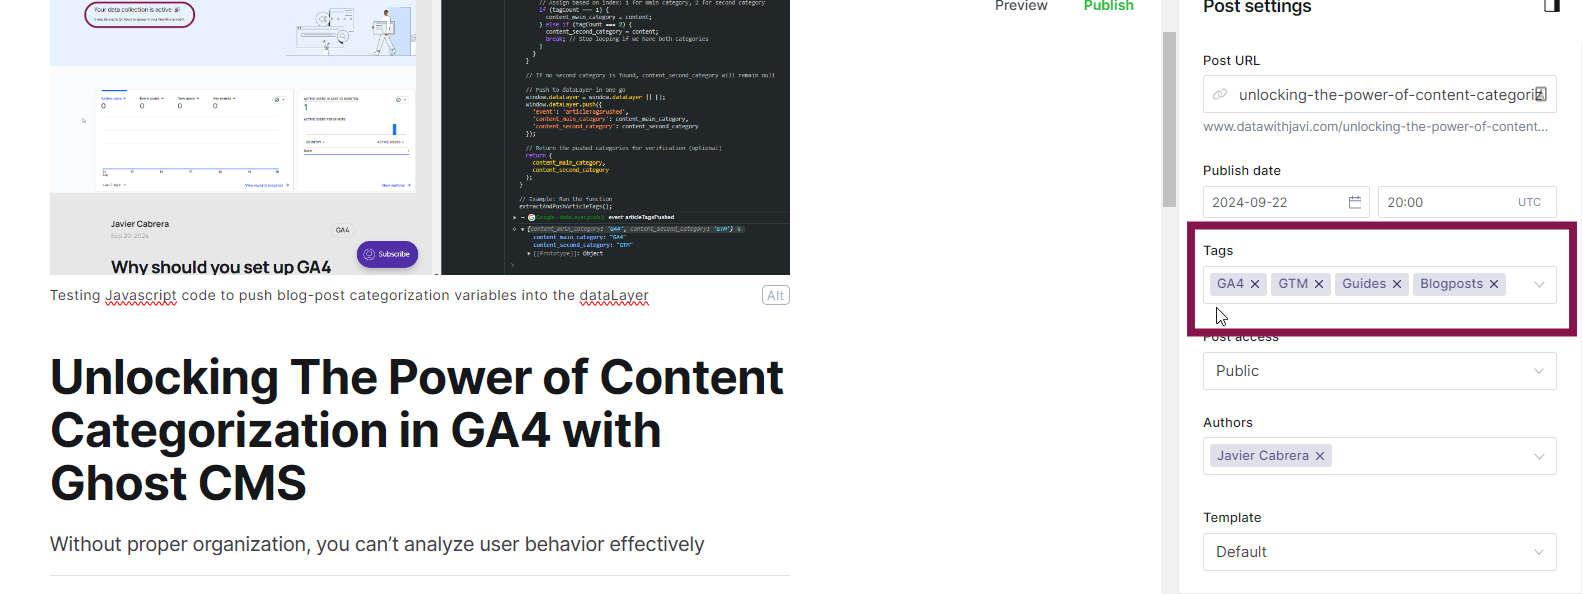
Ghost CMS by default does not allow us to create attributes to be used to categorize our content. However, we can leverage the order in which we apply our tags to a post or page for our GA4 categorization.

- Primary Topic (post_main_topic): The first external tag assigned to a post will define the main topic of the page/post.
- Secondary Topic (post_second_topic): The second external tag will define the secondary topic. For example, this could be "JavaScript" or "GTM" if we are also discussing implementation methods alongside the primary topic.
- Content Type (blog_post_content_type): For content intent, we will use the third tag.
- Blog Post Classification (is_blog_post): 4th tag.
And so on...
Capturing External Tags with JavaScript and Sending Them to the dataLayer
Before we dive into the JavaScript, let’s briefly explain the dataLayer. It’s a JavaScript object that holds information you want to pass to analytics tools like GA4. Think of it as a container where data, such as content categorization, is stored before being accessed by tools like Google Tag Manager (GTM) and sent to Google Analytics or other platforms.
We’ll explore its full functionality in a later post, but if you want to read ahead, here is Googles documentation on the topic.
Now, let’s see how we can use JavaScript to automatically capture content categories. By inspecting your site’s HTML in the browser’s developer tools, specifically in the "Elements" tab, you can easily locate the data you want to send to GA4. In our case, a quick look reveals the content categorization data we need inside the <head> tags of the DOM.

There are many ways to capture and send this data using JavaScript. As a heads up, I’m not a professional web developer, so the code I provide might not be fully optimized. If you spot any areas for improvement, don’t hesitate to let me know—I’m always open to learning and refining!
Meta Tag Extraction Script - Step by Step
1. The Function Declaration and Getting Meta Tags
function extractAndPushArticleTags() {
  const metaTags = document.getElementsByTagName('meta');
This line defines a function called extractAndPushArticleTags. A function is a block of code that runs when you "call" it.
The metaTags variable gathers all the <meta> tags in the document, allowing us to look through them one by one.
2. Initialize variables
let content_main_category = null;
let content_second_category = null;
let post_content_type = 'Unknown';  // Default value
let is_blog_post = 'Unknown';       // Default value
let tagCount = 0;
Here we define four variables to store the main category, second category, post content type, and whether the post is a blog post. We also initialize tagCount to track how many relevant meta tags we find.
3. Looping Through Meta Tags
for (let i = 0; i < metaTags.length; i++) {
  const metaTag = metaTags[i];
  if (metaTag.getAttribute('property') === 'article:tag') {
    tagCount++;
    const content = metaTag.getAttribute('content');
This for loop goes through each meta tag in the document. For each one, it checks if the property attribute equals 'article:tag'. If it does, we increase tagCount by 1 and extract the content value, which holds the actual category data.
4. Assign Categories Based on Tag Order
if (tagCount === 1) {
  content_main_category = content;
} else if (tagCount === 2) {
  content_second_category = content;
} else if (tagCount === 3) {
  post_content_type = content;
} else if (tagCount === 4) {
  is_blog_post = (content === 'Blog') ? 'Blog Post' : 'Non Blog Post';
  break;  // Exit the loop
}
Based on how many tags we’ve found (tagCount), we assign the first tag to the content_main_category, the second to content_second_category, and so on. After finding the fourth tag (which checks if it's a blog post or not), we stop the loop using break since we have all the information we need.
5. Push Data to the dataLayer
window.dataLayer = window.dataLayer || [];
window.dataLayer.push({
  'event': 'articleTagsPushed',
  'content_main_category': content_main_category,
  'content_second_category': content_second_category,
  'post_content_type': post_content_type,
  'is_blog_post': is_blog_post
});
Here, the extracted data is sent to the dataLayer. This lets analytics tools like GA4 access the information about the post’s content categories and type. This will push a dataLayer event named "articleTagsPushes" that will contain 4 categorization variables. Easily accesible through GTM.
6. Run the function
extractAndPushArticleTags();
Finally, we run the function. When the page loads, it automatically extracts the content categories and pushes them to the dataLayer.
The Full Javascript Code
This code searches for specific meta tags related to content categories, grabs the values, and sends them to the dataLayer for tracking. It identifies the main category, second category, content type, and whether it's a blog post, through the use of a tag order.
<script>
// Function to extract content from meta tags with property="article:tag" and push in one dataLayer object
function extractAndPushArticleTags() {
  // Get all the meta tags in the document
  const metaTags = document.getElementsByTagName('meta');

  // Initialize variables for main and second category with default values
  let content_main_category = null;
  let content_second_category = null;
  let post_content_type = 'Unknown';  // Default value in case it’s not found
  let is_blog_post = 'Unknown';       // Default value in case it’s not found

  // Track the number of article tags found
  let tagCount = 0;

  // Loop through all the meta tags
  for (let i = 0; i < metaTags.length; i++) {
    const metaTag = metaTags[i];

    // Check if the meta tag has a property attribute and it's "article:tag"
    if (metaTag.getAttribute('property') === 'article:tag') {
      tagCount++;
      const content = metaTag.getAttribute('content');

      // Assign based on tag order: 1 for main category, 2 for second category, 3 for post content type
      if (tagCount === 1) {
        content_main_category = content;
      } else if (tagCount === 2) {
        content_second_category = content;
      } else if (tagCount === 3) {
        post_content_type = content;
      } else if (tagCount === 4) {
        // Set is_blog_post based on the fourth tag's content
        is_blog_post = (content === 'Blogposts') ? 'Blog Post' : 'Non Blog Post';
        break;  // Exit the loop once we have all the necessary data
      }
    }
  }

  // Push the extracted data to the dataLayer in one go
  window.dataLayer = window.dataLayer || [];
  window.dataLayer.push({
    'event': 'articleTagsPushed',
    'content_main_category': content_main_category,
    'content_second_category': content_second_category,
    'post_content_type': post_content_type,
    'is_blog_post': is_blog_post
  });

}

// Example: Run the function
extractAndPushArticleTags();
</script>
A Javascript function that grabs data from a sites meta tags and pushes it to the dataLayer for quick integration with GTM.
Now, just add this code to your site’s header, preferably before your Google Tag Manager (GTM) script is loaded on the page. This ensures the content categorization data is pushed to the dataLayer early in GTMs loading.
Verifying the Code Works
Once you've added the script to your site's header, you'll want to verify that it's working correctly and pushing data to the dataLayer. Here's a simple step-by-step process to ensure everything is functioning as expected:
1. Open Developer Tools
- In your browser, right-click on the page and select Inspect (or press
F12). - Go to the Console tab in the developer tools.
2. Check the dataLayer
- In the console, type
dataLayerand pressEnter. - This will display the contents of the
dataLayerobject. - Look for the object with the
event: 'articleTagsPushed'that contains your main category, second category, content type, and blog post status.

Accessing the DataLayer in Google Tag Manager (GTM) and Sending It to Google Analytics 4 (GA4)
1. Accessing the DataLayer Variables in GTM
To use the data you’ve pushed to the dataLayer, you need to create Data Layer Variables in GTM.
Step-by-Step:
- Log in to GTM: Go to your Google Tag Manager account and open the container for your website.
- Go to Variables: In the left-hand sidebar, click on Variables.
- Create a New Data Layer Variable:
- Click New under User-Defined Variables.
- Name the variable something meaningful like
dlv_content_main_category. - Choose Data Layer Variable as the type.
- For the Data Layer Variable Name, enter the exact key as it appears in the dataLayer, e.g.,
content_main_category. - Save the variable.
- Repeat for Other Variables:
- Repeat the process for each of the other variables (
content_second_category,post_content_type,is_blog_post).
- Repeat the process for each of the other variables (
Now you have variables in GTM that will pull data from the dataLayer.
2. Creating a GA4 Event Tag in GTM
Once your variables are set up, you can create a tag in GTM to send these variables to GA4. I usually like to send these with my page_view event, but its up to you!
Step-by-Step:
- Create a New Tag:
- Go to Tags in GTM and click New.
- Name the tag something like
GA4 Content Categorization. - Choose Google Analytics: GA4 Event as the tag type.
- Set the Measurement ID:
- Select your existing GA4 Measurement ID.
- Set Event Name:
- In the Event Name field, enter
page_view. This will append your content categorization data to the standard page view event. - Make sure that if you are going the page_view route, you disable your configuration tag from sending it also to avoid duplication.
- In the Event Name field, enter
- Send DataLayer Variables as Parameters:
- Under Event Parameters, click Add Row.
- Enter the following keys and match them with the Data Layer Variables you created earlier:
- Parameter Name:
content_main_category, Value:{{dlv_content_main_category}} - Parameter Name:
content_second_category, Value:{{dlv_content_second_category}} - Parameter Name:
post_content_type, Value:{{dlv_post_content_type}} - Parameter Name:
is_blog_post, Value:{{dlv_is_blog_post}}
- Parameter Name:
- Set the Trigger:
- Add a trigger for when this tag should fire. You can choose an existing trigger like All Pages, or create a custom one if needed.
- Make sure the trigger fires after the event is displayed in the dataLayer. For this site the All Pages event worked perfectly fine.
- Save the Tag.

3. Publishing and Testing the Tag
- Preview Mode:
- Click on Preview in GTM to test the tag. This will open Tag Assistant in a new tab.
- Navigate through your website and ensure the tag fires correctly.
- Check that the content categories are being captured in the Variables section of Tag Assistant.
- Debug in GA4:
- In Google Analytics 4, go to Admin > DebugView.
- Trigger the event on your website and ensure that the event appears in the DebugView with the correct parameters (main category, second category, etc.).
- Configure your event parameters in the GA4 interface.
- Publish Your Changes:
- Once everything is working correctly, go back to GTM and click Submit to publish your changes live.
- Configure the Variables in GA4 Interface:
- Go back to GA4 > Admin > Data Display > Custom Definitions
- Create the custom dimension by inserting the name you gave your dataLayer variables in the tags configuration

Conclusion: Unlock the Power of Content Categorization in GA4
By leveraging Ghost CMS, JavaScript, and Google Tag Manager (GTM), you can easily capture and send content categorization data to Google Analytics 4 (GA4). This process not only helps you gain deeper insights into how different types of content are performing but also enhances your ability to make data-driven decisions for your website.
Whether you're adding this data to your page_view event or creating custom events, categorizing content allows you to track what matters most—whether it’s blog posts, guides, product pages, or anything else you create. This gives you a clear picture of how your audience interacts with your content, helping you optimize and grow your site.
If you’re new to this, don’t worry! Start small, experiment, and refine your tracking over time. And remember, tools like GTM and GA4 are flexible, so you can always update and tweak your setup as your site evolves.
Have questions or need further help? Don’t hesitate to reach out—I’m always here to learn, improve, and share knowledge!
